Animation schools today are more competitive than ever—and your portfolio is your passport. Aureole Studios’ Animation Portfolio Prep 2025 offers aspiring animators personalized, expert-guided training that transforms creative talent into polished, school-ready portfolios.
Why Choose Portfolio Prep 2025
This exclusive program combines technical skill-building with professional mentorship. Instructors include former Sheridan Animation professors who know exactly what admissions teams seek. You’ll refine storytelling, gesture drawing, character design, and visual development.
What You’ll Learn
Character Design & Storyboarding – bring your ideas to life through dynamic poses and clean structure.
Perspective & Composition – master visual storytelling for animation scenes.
Digital & Traditional Mediums – learn Photoshop, Toon Boom Harmony, and sketching fundamentals.
Critiques & Portfolio Presentation – one-on-one reviews designed to elevate your strongest works.
Online & Flexible Learning
Our hybrid format lets you join from anywhere. Students access live feedback, peer critiques, and exclusive resources through our online community.
Proven Results
Graduates of Portfolio Prep 2024 received offers from Sheridan, Seneca, OCAD U, and CalArts with scholarship recognition.
How to Create a Storyboard Portfolio That Tells a Story
Anyone can draw panels—but not everyone can tell a story. If you’re aiming for animation school or studio work, a great storyboard portfolio is more than pretty pictures. It shows you understand timing, staging, acting, and clarity.
At Aureole Studios, we help students master these principles through our Portfolio Prep and Animation Track. Whether you’re applying to Sheridan or prepping for a pitch, here’s how to build a storyboard portfolio that stands out.
1. Keep It Visually Clear
Storyboarding is about communication, not decoration. Reviewers (and directors!) need to understand the action in a split second.
Use:
Bold silhouettes
Clear eye direction
Consistent scale and proportions
Clean linework—no over-rendering
✏️ If a viewer can’t tell what’s happening at a glance, it’s too complex.
2. Start with a Short Script or Premise
You don’t need a full screenplay—but every storyboard needs a clear setup, conflict, and resolution.
Write a 1–2 sentence idea like:
“A nervous raccoon tries to steal a slice of pizza from a busy café patio—only to be chased by a toddler.”
Then break it down into beats: setup → rising action → climax → resolution.
🎬 Planning your beats before drawing saves tons of time and rework.
3. Show Camera Angles and Composition Variety
Avoid drawing all your panels at eye level. Use:
Wide shots for establishing
Over-the-shoulder shots for tension
Extreme close-ups for emotion
Birds-eye or worms-eye for drama or scale
This shows reviewers that you understand cinematography and know how to guide the viewer’s eye.
📷 Bonus: Use value or line weight to emphasize focal points.
4. Focus on Acting and Emotion
Animation is about bringing characters to life—even in still images. A strong storyboard shows how characters feel, react, and change.
Draw:
Facial expressions
Hand gestures
Posing shifts
Pauses and beats in pacing
🧠 Think like an actor: What is your character thinking in this moment?
5. Use Arrows, Captions, and Timing Notes
Arrows aren’t lazy—they’re part of the language. Use them to show movement, camera pans, or character focus. Add short text when needed to describe action, emotion, or cuts.
This helps the viewer read your intentions quickly, especially when your drawings are loose or gestural.
6. Keep It Short (but Polished)
For a portfolio, aim for:
1–2 short sequences (10–30 panels each)
One comedic or emotional beat
One action or cinematic sequence
Bonus: A rough animatic or timed GIF (optional but impactful)
🎥 Show quality over quantity—and include clear titles and context.
Want Feedback on Your Storyboards?
At Aureole Studios, our instructors offer personalized critique and help you structure narrative-driven portfolios that fit animation school and studio expectations.
We cover storyboarding, panel rhythm, acting, composition, and even animatic timing.
Dreaming of attending Sheridan, CalArts, OCAD, or another top-tier animation school?
You’re not alone—and you’re definitely not the only one applying. These schools receive thousands of applications, and most of them include talented, passionate artists. So how do you stand out?
At Aureole Studios, we specialize in helping students build competitive portfolios that check every box and rise to the top. Here are 7 essential tips to improve your chances of getting in:
1. Master the Fundamentals First
Top animation programs want to see technical strength, not just personal style. That means solid:
Figure drawing
Gesture
Perspective
Construction
Value & shading
If you’re skipping these in favor of over-rendered fan art, you’re shooting yourself in the foot.
🧠 Foundation first. Flair second.
2. Follow Each School’s Portfolio Requirements Closely
Every school has slightly different expectations. For example:
Sheridan requires life drawing, character rotation, and layout design
CalArts prefers more personal storytelling and sketchbook work
Others may require animation tests or perspective-based scenes
Read the official guidelines, not just YouTube summaries. Then organize your portfolio to match the required order.
✅ Bonus tip: Make it easy for reviewers to find what they’re looking for—label clearly and avoid fluff.
3. Include Life Drawing & Observation
Schools can spot a “Pinterest-only” artist a mile away. They want to see that you’ve trained your eye by drawing from real life—people, interiors, objects, animals, etc.
At Aureole Studios, we run weekly Figure Life Drawing sessions for exactly this reason.
✏️ Include a mix of short gestures and longer poses in your final portfolio.
4. Show Character Design Thinking (Not Just Cool Outfits)
When presenting character designs, don’t stop at “cool.” Schools want to see your process: gesture poses, facial expressions, turnarounds, and how design reflects the character’s personality and story.
💬 Ask yourself: “If this character walked into a scene, what would they say? How would they move?”
5. Show Sequential Thinking (Storyboards, Layouts)
Animation is about movement and storytelling, so your portfolio should include examples of sequences, not just stand-alone art.
That could include:
Storyboard panels
Interior layouts with camera angles
Character interactions in a scene
🎥 Show that you understand time, space, and pacing.
6. Curate, Don’t Overstuff
Don’t try to show everything you’ve ever drawn. Your portfolio should feel like a focused, intentional project, not a sketchbook dump.
Aim to include:
3–5 life drawings
1–2 characters with full exploration
1–2 environmental designs or layouts
1–2 storytelling sequences
Bonus: sketchbook pages that show exploration
🗂️ The quality of your work is more important than the quantity.
7. Start Early, and Ask for Feedback
Most rejected portfolios aren’t bad—they’re unfinished. If you wait until the last minute, you won’t have time to iterate and improve.
Start months in advance. Schedule reviews with mentors or instructors. Fix the weak spots. Push the strong pieces further.
📆 At Aureole Studios, we begin working on portfolios with students 6–12 months before their application deadlines.
Ready to Get Accepted?
We’ve helped dozens of students get into Sheridan, OCAD, and other top animation programs by providing the structure, critique, and portfolio planning they need to succeed.
When starting out as an artist, many students ask us: “Should I learn traditional art first, or go straight into digital?”
It’s a fair question—and the answer depends on your goals, learning style, and long-term vision. But whether you’re holding a pencil or a stylus, one thing is always true: you need strong fundamentals.
At Aureole Studios, we teach both—so let’s break down the differences, advantages, and how you can combine them to get the best of both worlds.
🎨 Traditional Art: The Foundation of Visual Literacy
Pros:
Helps you understand physical materials (pencil, charcoal, ink, paint)
Forces intentional decisions—no undo button!
Builds hand-eye coordination and observational skills
Trains you to think in layers and construction (especially with figure drawing)
Ideal for:
Beginners who want a strong grounding in observation and technique
Those looking to build a professional online portfolio
💡 Digital tools are powerful—but can enable bad habits if you skip structure.
🔄 Why Not Both?
Here’s the truth: You don’t have to choose. Many of our students start with pencil and paper to master control and form, then transition into digital tools once they’ve built a strong foundation.
🧠 Think of traditional as your strength training… and digital as your speed training.
What We Recommend at Aureole Studios
📌 Beginners: Start with sketching, gesture, and simple rendering in pencil or charcoal. Focus on form, line quality, and proportion.
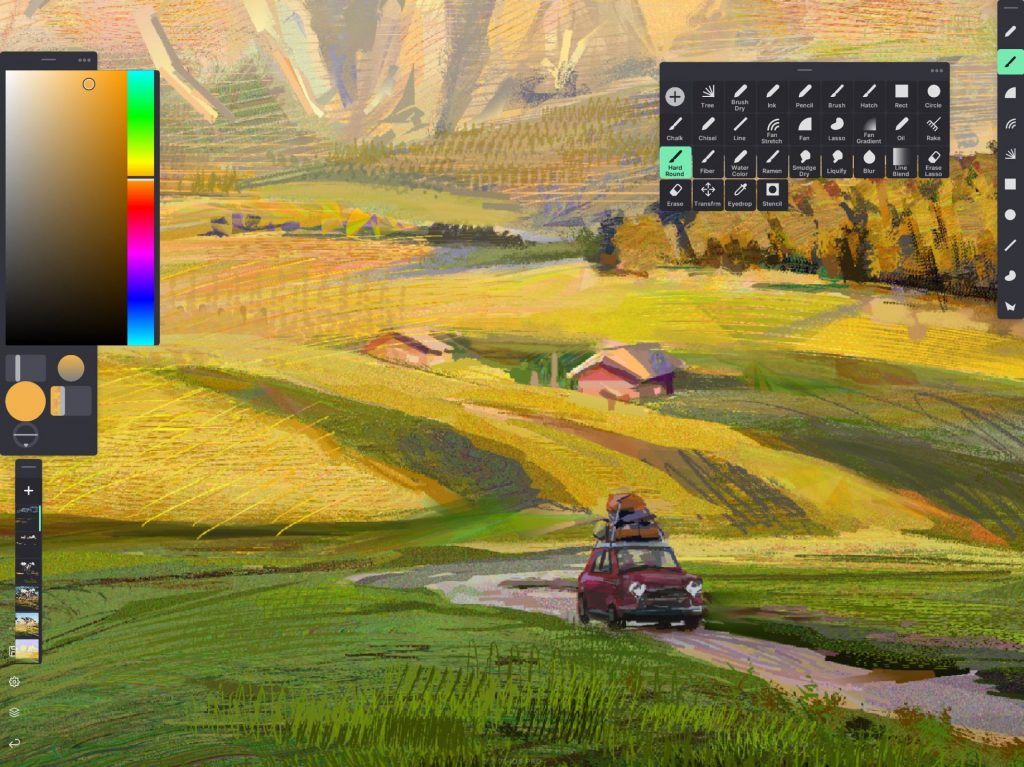
📌 Intermediate Artists: Begin blending traditional drawing with digital tools like Procreate or Photoshop. Explore color theory, lighting, and brush control.
📌 Portfolio Prep Students: Use both media to show versatility—life drawings in graphite, character work in digital, storyboards in ink, etc.
Ready to Train in Both Worlds?
Our programs at Aureole Studios are built for artists who want to thrive in both traditional and digital spaces. Whether you’re prepping for Sheridan, applying to CalArts, or just starting out—we’ll help you build a skillset that’s versatile, competitive, and creatively fulfilling.
Everyone starts somewhere—but some habits can quietly slow down your growth as an artist. If you’ve ever felt stuck, frustrated, or like your art isn’t improving as fast as you’d hoped, chances are you’re falling into one (or more) of these common beginner traps.
At Aureole Studios, we see these mistakes often—and we help students fix them with clear, practical strategies that unlock real progress.
1. Overrendering Before Structure
It’s tempting to jump straight into coloring and detail—but if the underlying sketch isn’t solid, all that effort ends up masking fundamental issues like anatomy or proportion.
Fix it: Focus on solid line drawings and gesture before diving into shading or effects. Think “structure first, style second.”
2. Avoiding Reference (or Overusing It)
Some artists think using reference is “cheating,” while others copy it 1:1 without learning from it. In reality, reference is a tool—not a crutch.
Fix it: Use reference to understand form, lighting, and design, then interpret it in your own way. Start with life or photo reference and challenge yourself to create variations.
3. Using Too Many Colors
New artists often throw in every color in the rainbow, leading to muddy or chaotic pieces. Instead, stick to a limited palette and learn to use color with intention.
Fix it: Choose 2–4 main colors, then vary their value and saturation. Focus on contrast and harmony, not just variety.
4. Neglecting Value and Lighting
Without good value contrast, your artwork can feel flat—even with great linework and color. Lighting is what gives your drawings weight and realism.
Fix it: Practice in grayscale first. Use simple lighting setups (like one light source) to train your eye on how light and shadow define form.
5. Drawing Only from Imagination
Drawing from your head is great—but if you’re not also drawing from life or study, you’re reinforcing your current limitations.
Fix it: Split your practice: 50% from imagination, 50% from observation. Use figure drawing sessions, still life studies, or master copies to expand your visual library.
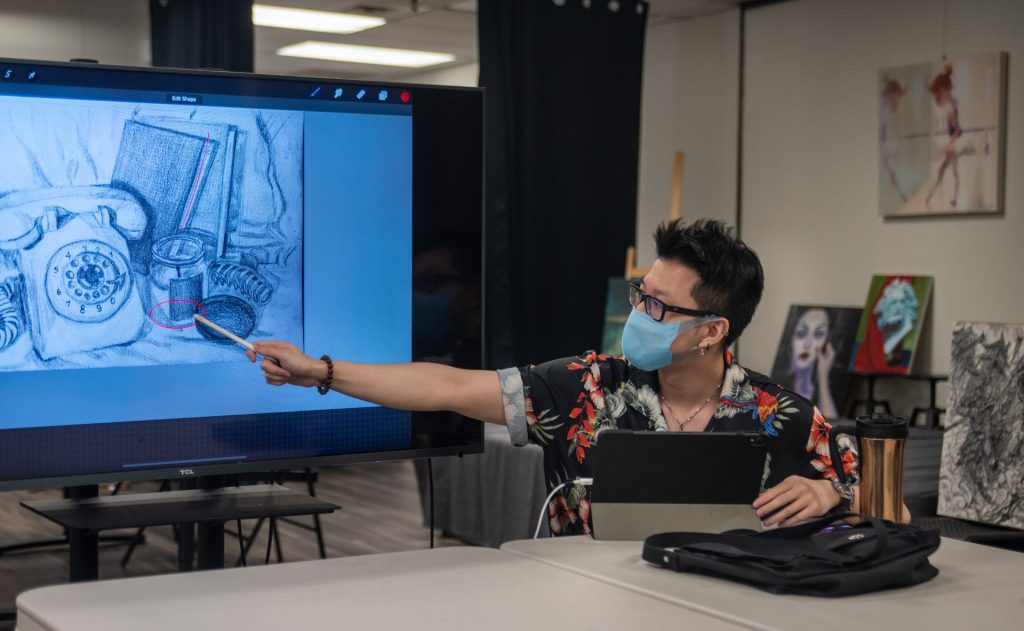
6. Not Seeking Feedback
One of the fastest ways to improve is by getting honest critique—but many beginners avoid it out of fear or insecurity.
Fix it: Ask for constructive feedback from peers, mentors, or instructors. At Aureole Studios, our teachers provide weekly critiques and tailored advice to help students break through plateaus.
Ready to Break Bad Habits?
Our courses in Fundamentals, Digital Painting, and Portfolio Prep are designed to help you correct these mistakes early—so you can grow faster, more confidently, and with the support of a pro team.
Whether you’re applying to Sheridan Animation, OCAD, CalArts, or another top art program, your portfolio is your ticket in. But what makes a portfolio stand out from the stack?
At Aureole Studios, we’ve helped hundreds of students get accepted into the top visual arts and animation schools around the world. Here’s what you need to know to build a successful, strategic, and unforgettable art school portfolio.
1. Know the Requirements—Inside and Out
Each school has different requirements, and they can change yearly. Make sure you:
Read the official portfolio guidelines on the school’s website
Note the number of required pieces
Understand whether you need life drawings, animation tests, perspective, or personal work
Tip: Don’t rely on YouTube summaries—get the info straight from the school.
2. Balance Technical Skill and Creativity
You need to show that you’ve mastered the fundamentals—like figure drawing, perspective, and composition—but schools also want to see your personal voice.
Your portfolio should include:
Strong observational drawings (especially from life)
Think of it like this: technical = “I’ve got the skills.” Creative = “Here’s what I’ll do with them.”
3. Sequence Matters
The order of your pieces makes a difference. Start strong, end strong, and avoid placing your weakest work in the middle.
If possible, show progression and range, such as:
Loose gesture drawings
Finished figure studies
Storyboarding or concept art
Environmental or perspective work
Bonus: a sketchbook with personality
We help our students design their portfolio flow for maximum impact.
4. Avoid Common Mistakes
❌ Over-reliance on digital fan art ❌ Overworking a piece with too much polish ❌ Submitting old work that no longer reflects your current skill ❌ Ignoring feedback or portfolio critiques
You only get one shot—make every piece count.
5. Get Feedback and Redo Pieces If Needed
The strongest portfolios are iterated—not rushed in a single week. Take critique, be willing to redo a piece, and always push for growth.
At Aureole Studios, our instructors offer portfolio reviews, weekly critique sessions, and 1:1 feedback loops that help you meet submission standards early.
Ready to Start Your Portfolio Journey?
We offer dedicated Portfolio Prep Programs, life drawing classes, and a supportive environment to help you apply with confidence—whether you’re aiming for a college program or a professional studio role.
You could have perfect anatomy, clean lines, and compelling concepts—but without good color choices, your artwork might still fall flat. Color theory is the secret weapon that helps your illustrations grab attention, tell stories, and stir emotion.
At Aureole Studios, we help students go beyond just “picking pretty colors” and instead apply intentional color theory to every painting and design. Here’s how mastering color can bring your portfolio to life.
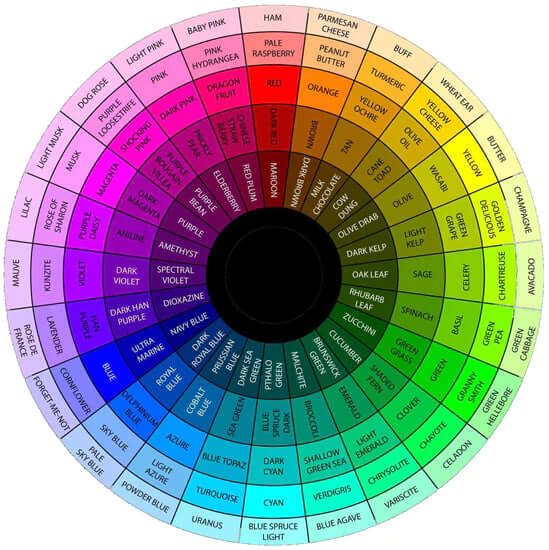
1. Understand Color Relationships
Before diving into complex palettes, it’s important to understand the basics: complementary, analogous, and triadic color schemes.
Complementary: colors opposite on the color wheel (like blue/orange) create strong contrast
Analogous: colors beside each other (like red/orange/yellow) feel harmonious
Triadic: colors evenly spaced around the wheel (like red/blue/yellow) offer vibrant balance
Try creating one piece using each type of scheme—it’s a great way to expand your creative range.
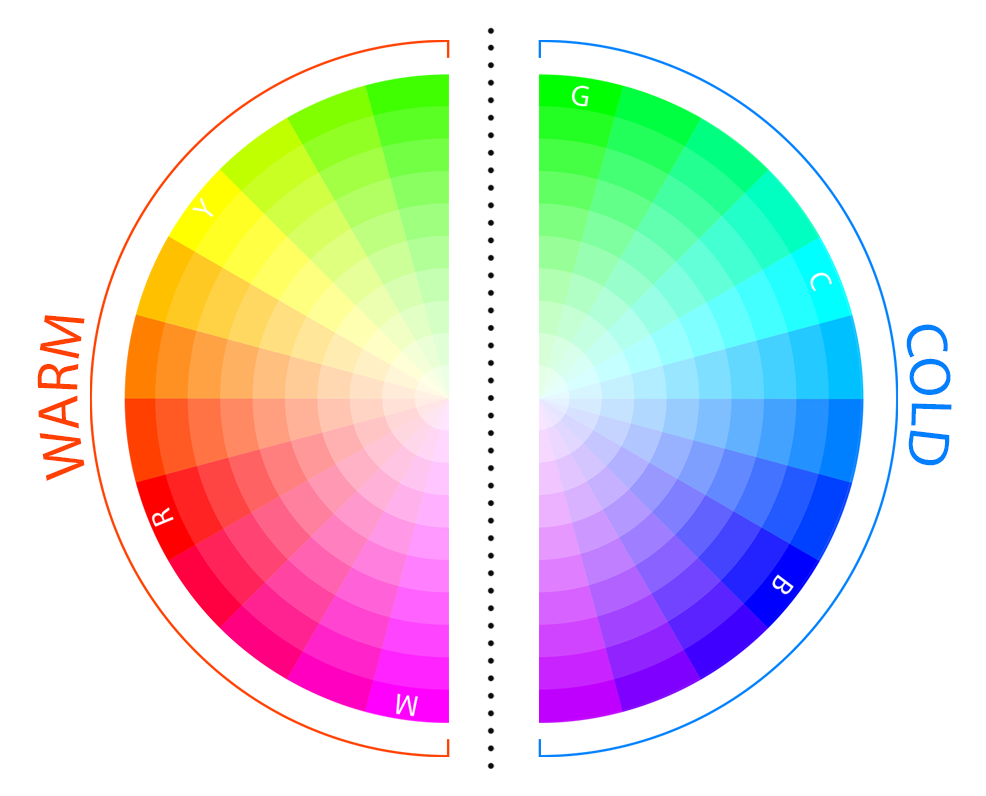
2. Learn Warm vs Cool Temperatures
Color temperature changes everything. Warm colors (red, orange, yellow) feel energetic and alive, while cool colors (blue, green, purple) calm things down.
Even within a single character or background, mixing warm and cool helps you show depth, volume, and atmosphere.
Pro tip: Use warm colors for focal points and cool tones in the background to create visual hierarchy.
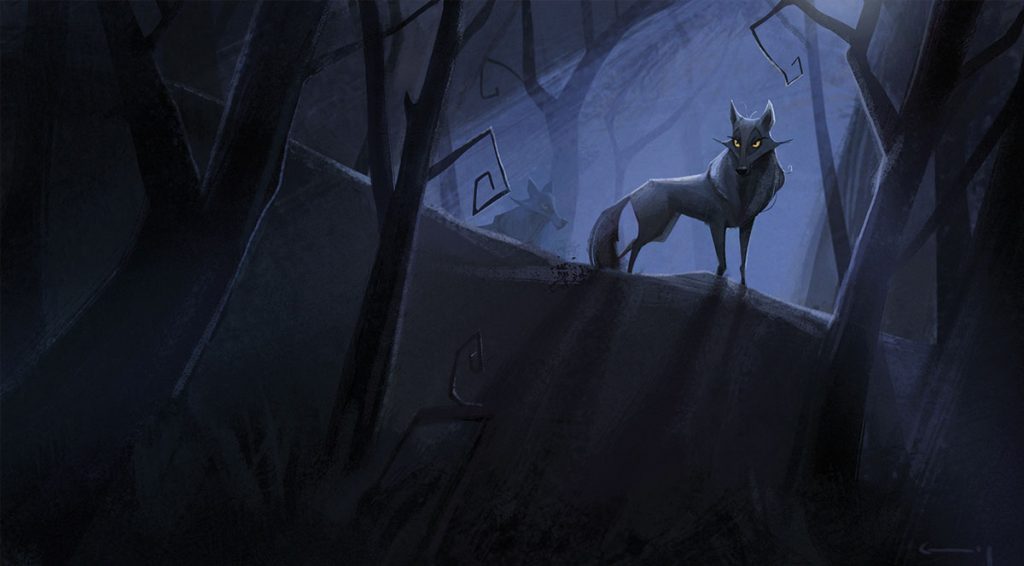
3. Use Color for Mood and Storytelling
Colors aren’t just aesthetic—they tell stories. A gray-blue scene feels lonely or quiet. A red-lit environment might feel dramatic or dangerous.
When building your portfolio, use color to create emotional tone and narrative—especially in sequential illustrations or character concepts.
Ask yourself: What emotion do I want this piece to express? Then build your palette accordingly.
4. Don’t Overcomplicate Your Palette
One of the most common beginner mistakes is using too many colors. Instead, choose 2–4 dominant hues, and build variations through saturation, brightness, and value.
At Aureole, we teach students to build limited but versatile palettes that keep their work cohesive and professional.
Exercise: Limit yourself to just 3 hues and build an entire environment piece.
5. Make Your Colors Work Harder
Here’s a secret: you can control focus, motion, and shape—all through color.
Use high contrast to draw the eye.
Use saturation shifts to show importance.
Use temperature variation to separate planes of space.
Great artists don’t just paint—they direct the viewer’s experience with every color choice.
Want to Boost Your Color Confidence?
Our Digital Painting and Super Paint Slay classes at Aureole Studios give students the practical tools to master color theory, build mood boards, and execute color scripts for portfolio pieces.
Digital painting is more than just drawing on a screen—it’s a fusion of traditional art fundamentals and tech-savvy workflows. Whether you dream of working in games, animation, or building a standout art portfolio, there are 8 essential skills you need to develop to thrive as a digital painter.
At Aureole Studios, we break down each skill in our Digital Painting and Portfolio Prep classes so students can gain real confidence—not just polished surface results.
Here’s what every digital painter should master:
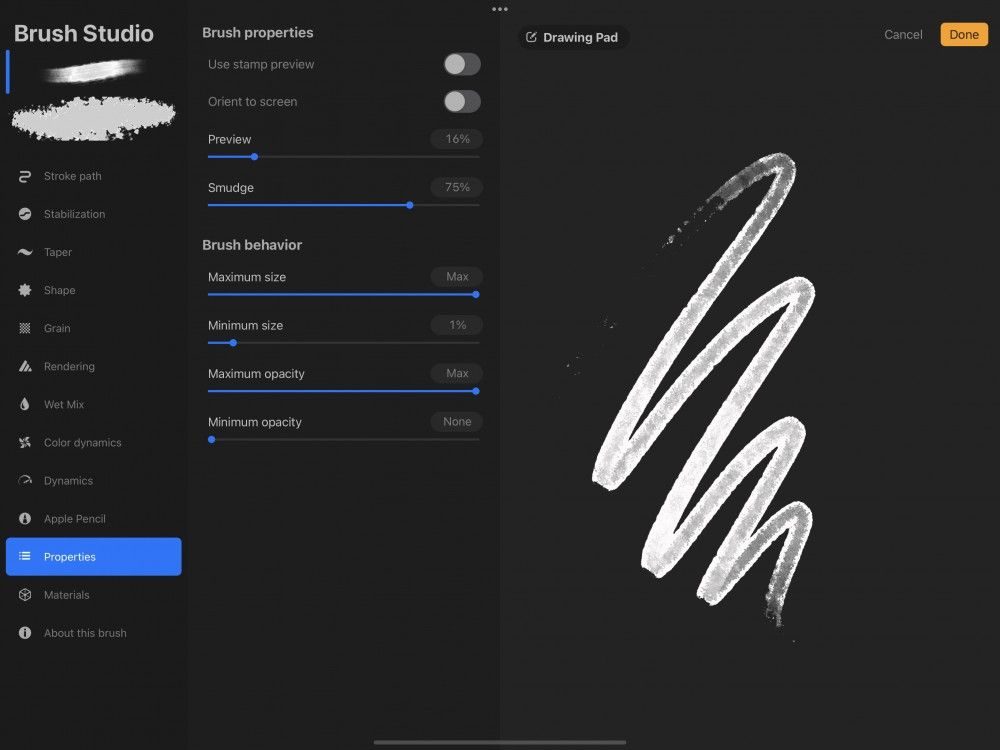
1. Brush Control & Pressure Sensitivity
Understanding how to control your stylus pressure is fundamental. It affects line quality, opacity, and texture. With better brush control, your work will feel intentional instead of “wobbly” or overworked.
Pro tip: Use custom brushes, but always master the basics first.
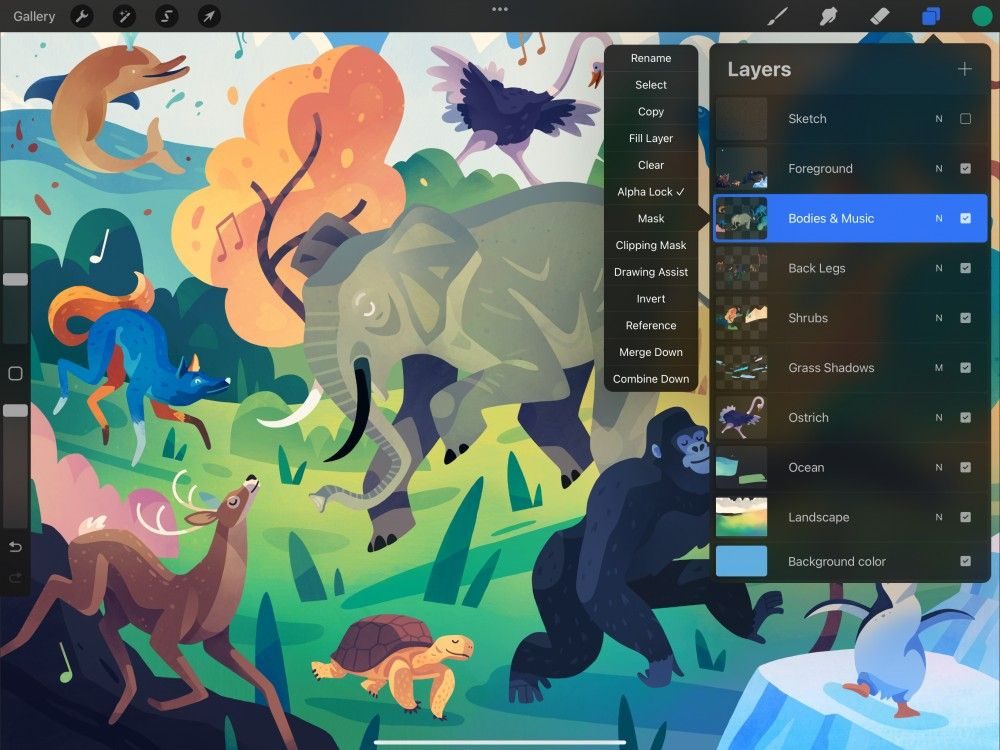
2. Layer Management
Digital art gives you the ability to separate elements into layers, and knowing how to name, group, and lock layers helps you work faster and cleaner. Poor layer management leads to chaos—especially on tight deadlines or team projects.
Quick habit: Use folders for characters, backgrounds, linework, and color.
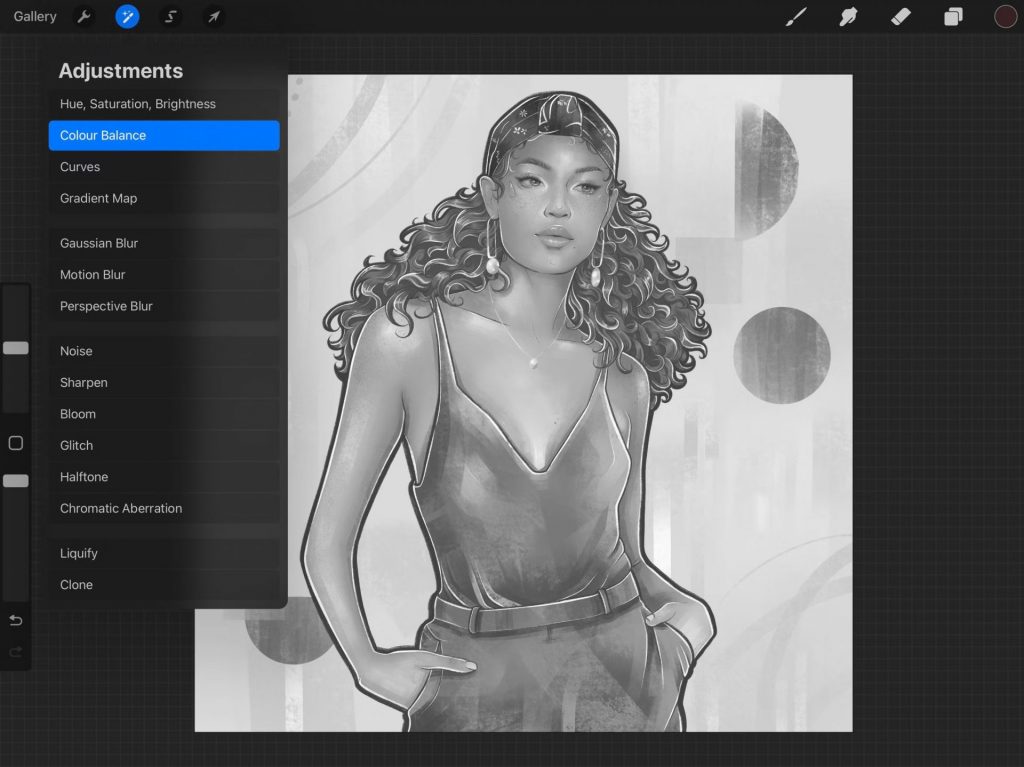
3. Value & Contrast Awareness
Before color, there’s value. Great digital paintings use clear light and dark areas to define forms and build mood. Try painting in grayscale first to focus purely on shape, form, and composition.
Exercise: Convert your work to black and white to test readability.
4. Color Blending & Palette Control
Color can make or break your artwork. Learn to blend color with a soft brush, smudge tool, or low-opacity techniques. Stick to a limited palette until you build confidence.
Tip: Master warm vs. cool contrast for stronger emotional impact.
5. Edge Control: Soft vs. Hard
Not every edge needs to be sharp. Soft edges suggest form and atmosphere, while hard edges draw attention. Knowing when to use each creates depth and focus in your composition.
Study tip: Zoom in on master paintings to study edge work.
6. Lighting & Rendering
Lighting gives form to everything. Study how light behaves—where it hits, where it bounces, and where it fades. Mastering this helps your paintings feel realistic, stylized, or dramatic—whatever your intent.
Practice: Repaint a still life or 3D model with one consistent light source.
7. Texture Techniques
Textures add realism and interest. Learn to paint or overlay textures like skin, fabric, wood, or clouds. Use texture brushes carefully to enhance—not hide—your fundamentals.
Pro trick: Use Multiply or Overlay layers to add texture to flat areas.
8. File Organization & Export Settings
An often-overlooked skill: save in layers (.PSD), export correctly for web and print, and know your DPI settings. Efficient file habits help you share work with clients, teams, and schools with confidence.
Bonus: Always keep backups of your raw files!
How to Learn These Skills (Faster)
At Aureole Studios, our Digital Painting course is designed to build all 8 of these skills through weekly exercises, class demos, and instructor feedback. We help students go beyond tutorials and YouTube habits—toward building original, confident digital artwork for portfolios and careers.
Whether you’re designing dynamic characters, expressive poses, or compelling scenes, strong anatomy skills are the foundation of confident illustration. You don’t need to become a doctor, but understanding how the human body moves and functions will level up every stroke you make—especially if you’re building a portfolio.
At Aureole Studios, we’ve guided hundreds of artists through anatomy bootcamps, life drawing sessions, and portfolio coaching. Here are 5 proven ways to build your anatomy knowledge and apply it in your work.
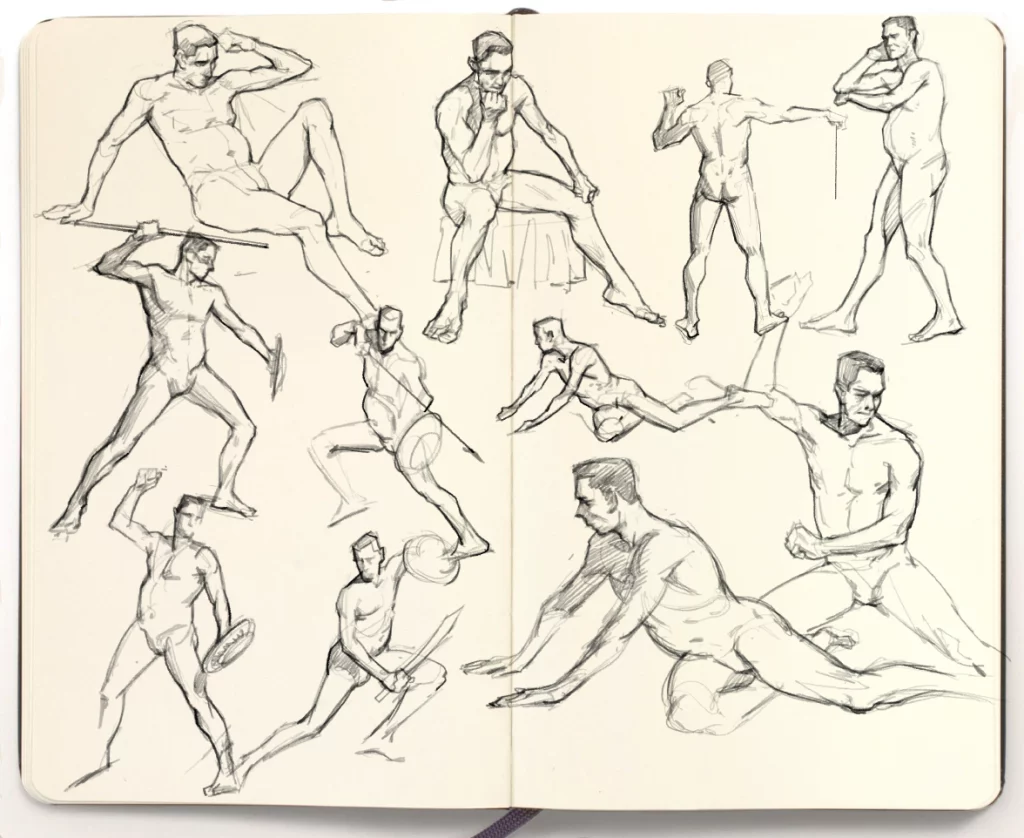
1. Start with Gesture Drawing
Gesture drawing helps you capture the essence of a pose, not just its outline. Spend 30 seconds to 2 minutes drawing real-life models or using references. Focus on movement, weight, and flow, not perfect proportions.
Quick tip: Start each practice session with 5–10 gesture sketches to loosen up your hand and eye.
2. Study the Skeleton and Muscles (Yes, Really!)
To draw the body accurately, you need to understand what’s beneath the surface. Learn the basic structure of bones (like the ribcage, pelvis, limbs) and major muscle groups.
You don’t need to memorize every bone, but knowing what creates bumps, shadows, and curves gives your drawings a sense of realism and intention.
Pro tip: Try drawing simplified skeletons over your sketches to correct proportion and pose balance.
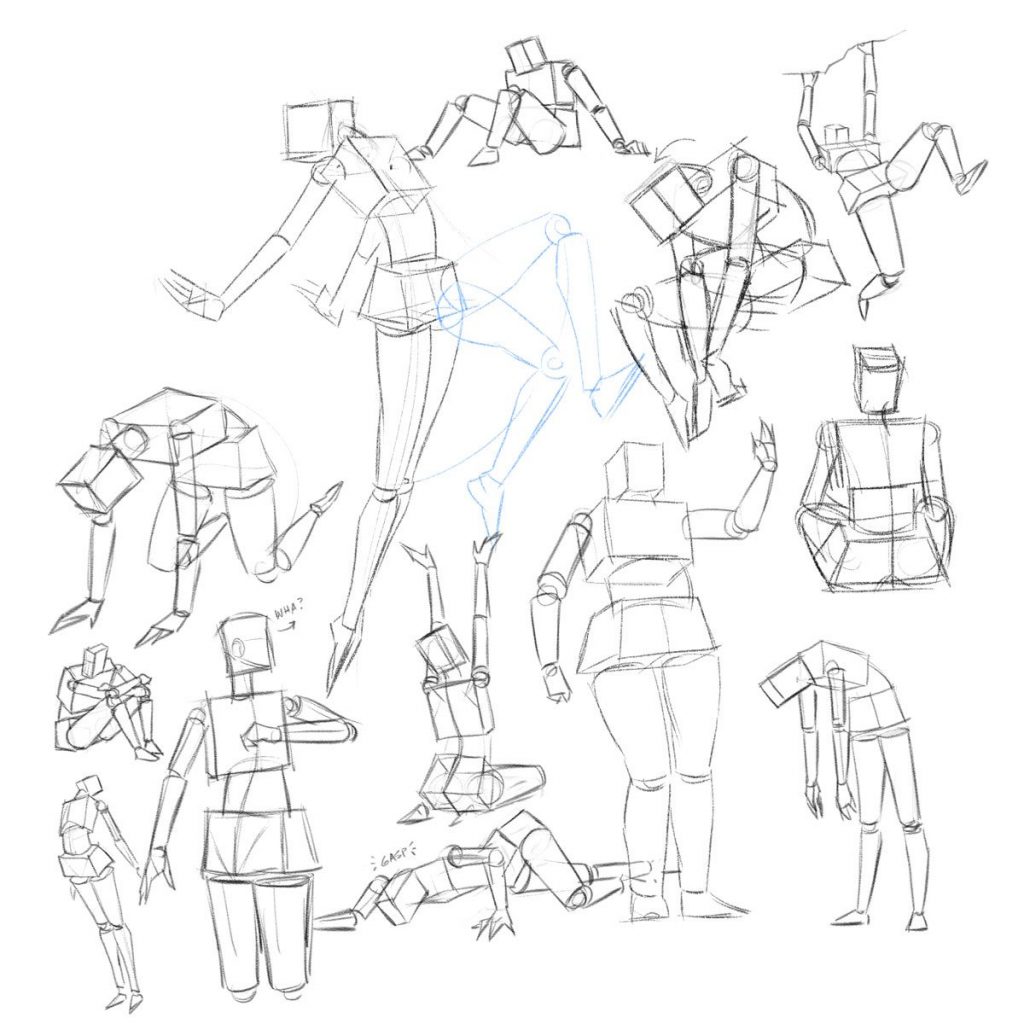
3. Simplify Complex Forms into Boxes and Cylinders
Anatomy can feel overwhelming—but breaking down the body into simple 3D forms makes it easier to manage. Think of the torso as a box, arms as cylinders, and the pelvis as a tilted bucket.
This approach helps you rotate the body in space, maintain volume, and create better foreshortening.
Exercise: Try redrawing photos or your past art using only boxes and cylinders.
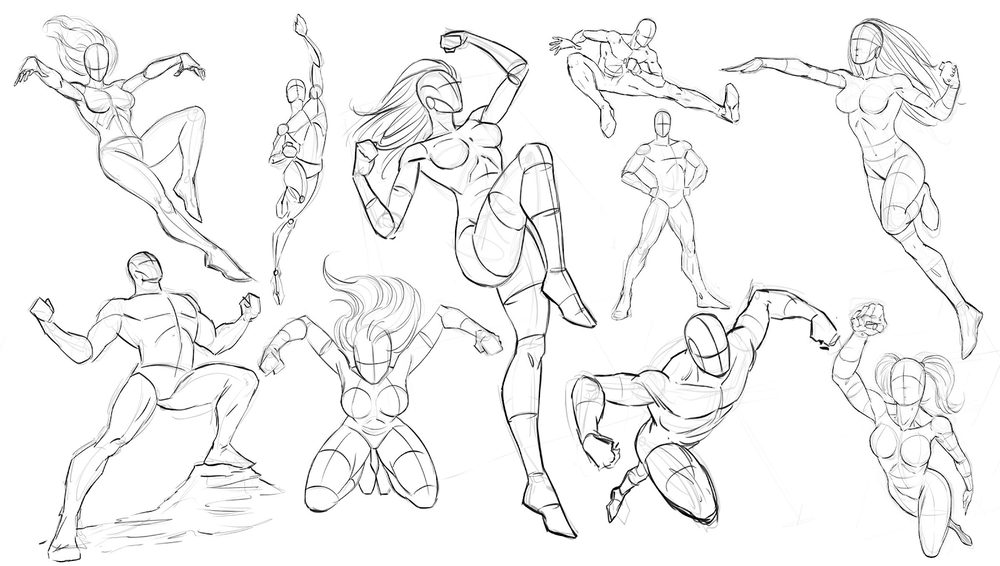
4. Explore Dynamic Poses
Static characters can flatten a portfolio. Once you’re comfortable with structure, push yourself to draw twisting, leaning, jumping, and off-balance poses. It’s okay to exaggerate—what matters is that the pose feels believable.
At Aureole, our Figure Life Drawing sessions include timed poses and instructor feedback to help you build up this skill naturally.
Resource: Check out our in-person or online life drawing sessions to practice with real models.
5. Review and Revisit Your Old Sketches
Improvement comes from reflection. Flip through your older figure sketches, note what has improved, and re-draw your own work using your current knowledge.
Anatomy is a lifelong study—even pros keep practicing. Give yourself space to grow.
Want Help with Your Anatomy Practice?
At Aureole Studios, we offer both fundamentals classes and portfolio prep intensives that emphasize anatomy, figure drawing, and structure-building. Whether you’re applying to art school or aiming for the animation industry, we’re here to guide your next level-up.